
The Imola circuit has returned to the real life F1 calendar just in the last few years, and although the real life race was cancelled in 2023, the track still features on the F1 23 game. And it’s very popular as well – a very high speed, technical and challenging circuit to get right lap after lap, with not much time to rest. It’s great for competitive racing.
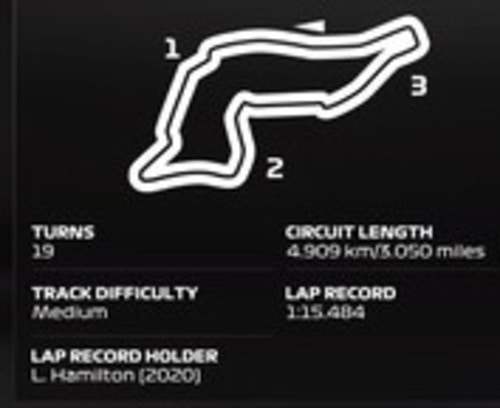
Despite being on full throttle for a large amount of the lap, there are also high speed technical chicanes and cornering sections where you need good grip. Therefore, this track usually works best when you run a medium downforce level.
Here’s a general baseline dry race setup for Imola for a controller user:
- Wings – 23/25
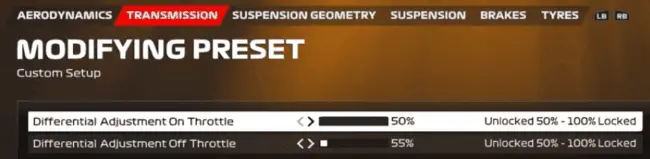
- Diff – 50/55
- Camber – -2.7/-1.0/0.02/0.13
- Suspension – 24-6-6-1-33-36
- Brakes – 100 Pressure/55 Bias
- Tyre pressures – Fronts 22.7/Rears 20.3
This setup is partially taken from the SimRacingSetups channel Imola setup, but changed quite a bit with the wings adjusted and spaced more apart for better pad handling and other tweaks, since he’s a wheel user and the two inputs are very different and the two devices don’t translate over well in terms of input.
On this track, you really need a car setup that is stable, with optimal turn in (not too little but not too much as well), and also one that can manage tyres well, since wear is surprisingly high here.
More Detailed Setup Considerations
Imola is really a tricky circuit to find an optimal setup on, and it’s a classic example of having to trade-off and compromise certain car qualities for others and find a middle ground that works. Here are some setup recommendations for the track:
Wings
Imola is a mix of medium and long straights with high speed chicanes and corners in between. There isn’t much slow speed stuff there.
The pit straight is also the DRS straight, and you do need good top speed to defend and pass on that, but you also need good downforce for the high speed corners, so putting somewhere just below the middle seems to work as the best compromise.
And as with a lot of tracks on F1 23, it’s also recommended to set the eventual wing levels a couple of clicks lower than your optimal one lap pace might suggest, simply because straight line speed is king on this game, and running slightly lower wings gives you a big advantage in the race, with how powerful the DRS/ERS/Slipstream effect is.
Lower downforce setups over-powered on F1 23 – especially at Imola
Therefore even my wing setting of 23/25 might be a bit too high, and you might want to go down as low as 20 if you’re struggling to overtake/defend on straights.
Suspension
My setup softens the suspension and anti-roll bars a few clicks more than other setups, because I find the baseline setups too twitchy and nervous round here on a pad, and it’s easy to clip kerbs or the grass with how narrow the track is at certain points. So I’ve gone for slightly softer suspension and roll bars for a more planted, stable feel
Qualifying
Imola is definitely not my best track for single lap pace, but it’s fair to say this setup isn’t the strongest in Quali either. But it comes back to you in the race if you drive consistently, as per the video above.
If you’re wanting more single lap pace in Qualifying, you can try bringing the wings closer together or reducing the Off Throttle Diff for better rotation, but it will make the traction harder out of corners.
Intermediate Conditions
With DRS disabled in the wet, straight line speed becomes a little less crucial, but you still need it as ERS alone is still powerful, especially on the massive pit straight.
Your dry setup with still work OK in intermediate conditions, but try adding 1-2 clicks of front and rear wing for more downforce and grip in the high speed chicane and cornering sections. I’d also space the wings 3 clicks apart for better stability – over-rotation is really trick on a pad in the wet and stops you getting back on the traction smoothly.
Also put your On Throttle Diff down to 50 if it isn’t already there.
Full Wet Conditions
Heavy rain is not uncommon at Imola, and in full wet conditions, you do need a substantial amount more downforce, grip and traction.
Therefore, try adding 4-8 clicks on wing to your dry setup, plus moving the on Throttle Diff down to 50 if it’s not already there is a must for best traction.
Raise your ride height a few clicks. For pad users, the 2 click spacing between the rear/front wing works well in the dry, but you might need to raise it to 3 clicks for full wet conditions, just to get the stability you need on a controller and stop the car over-rotating so you can’t get back on the traction early enough.
Here would be the full wet setup I’d use on a controller at Imola:
- Wings – 30/33
- Diff – 50/55
- Camber – -2.50/-1.00/0.00/0.10
- Suspension – 22-6-6-1-36-39
- Brakes – 95 Pressure/55 Bias
- Tyres – Fronts 22.3/Rears minimum
Basically, you’re just adding a bunch more downforce, as that does now take precedence, although make sure you’re consistent and get a good exit out onto the massive long pit straight, with a boost of ERS if needed to stop overtake attempts from chasing cars.
Extra Setup Resources
Imola is a really tricky, technical circuit, and there are different paths you can go down with car setup. Although I enjoy the challenge of it, it’s also not my strongest circuit at all, so if my pad setup isn’t working for you, here are some other setup resources to check out:
- F1laps.com Imola page – Another car setup forum with pages for every track, and loads of custom setups posted, both TT and race, all cars, all conditions.
- F1gamesetup.com – An even more specialized resource with custom setups, every car and every track, wet and dry weather
Tips For Racing At This Track
Imola is one of the more challenging circuits to race on, because you don’t get much break and it’s tricky to put a good lap in there time after time after time, and it’s VERY easy to make a mistake and end up off the circuit with a broken wing.
There are a LOT of moving parts that you need to consider and juggle while racing there; here are some of the main ones:
First sector – The kerbs at the first two chicane sections are lethal. Do NOT ride the kerbs on the first chicane at all; just be precise and thread the car through accurately and don’t try to “force” lap time by riding the kerbs (they’re raised and will spit you off). The second chicane you also need to be wary of; you can clip the kerbs with your tyres, but that’s all. Don’t ride these kerbs either as they’ll auto-spin you.
Last chicane – The last chicane – at the top of the hill before you come down the hill to finish the lap – is the opposite to sector 1. You have to ride this chicane for best lap time. Throw half your car over each kerb, but keep at least one wheel on the track at all times. Don’t apply throttle while riding the kerbs, and be patient before getting back on the throttle at exit. Nailing this chicane section without spinning or getting track limit warnings just requires practice and “repping” it out, but when you get it right, you can gain serious time over the AI.
ERS – The ERS battery boost runs out insanely quickly at Imola, despite it being only a medium downforce circuit. Once you spend it, it’s almost impossible to recoup, so be very sparing with the ERS. Just use it when exiting onto the pit straight to defend/overtake, and be very cautious otherwise, waiting for others to exhaust their battery.
Track limits – Because so many of the corners are high speed and we’re always looking to find time, it’s VERY easy to run drift wide off track and get corner cutting warnings here. Try to focus on consistency rather than being too aggressive in online races; let the others rack up 3/6/9 seconds of penalties, and you’ll jump them with cleaner driving.
Tyres – Tyre wear is also surprisingly high at Imola, as is degradation. You get a few strong laps out of new tyres, then pace falls off quite a lot, so the “undercut” can be quite powerful here if you’re stuck behind a few cars.
Fuel – This circuit uses more fuel than normal because you’re on the throttle for so long with little respite. Be sure to bump up your starting fuel load to avoid running out in longer races.
DRS – There’s only one DRS zone at Imola, but it’s the very long pit straight, so it’s quite powerful. Focus on getting a good exit from the final two left handers onto the pit straight and use a blast of ERS if needed to defend against chasing cars. Get a poor exit and you’ll likely be passed by any car using the DRS/ERS/Slipstream combo on the very long main straight.
Practice – Imola is a really challenging, intense track to race on. There’s only really one racing line, you need to focus as there isn’t much respite, and it’s a very technical track to get right. Because much of the circuit is so narrow and there’s a lot of raised kerbs, it’s very easy to end up on the grass or in the barrier.
It’s not advised to just turn up to competitive races at Imola and hope everything works out fine; it’s really a track you need to practice beforehand on to build up a good rhythm and consistency. Same for career mode – it’s really a circuit when it can pay to make full use of the practice sessions to master the layout and find a setup that works for you.
