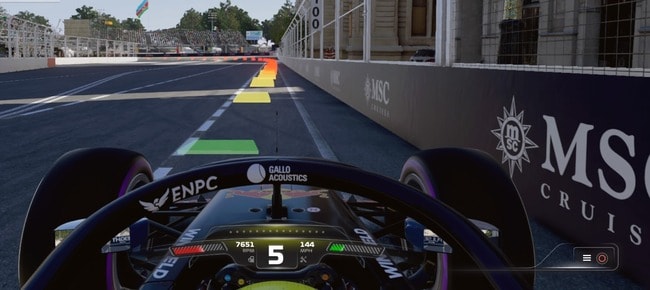
In the F1 racing setup world, it’s the F1 cars that get the most attention. But the F2 cars can be fun to drive as well, and have their own handling style and challenges that it can be enjoyable to try and get used to.
And since many players do begin their career in F2 on these games, and the F2 setups often get neglected, I thought I’d knock up a quick setup guide like I did for the F1 cars for the F1 23 game.
I’ve list below both a generic/template setup, and then specific track setups, for F2 cars on this game. But first, here’s some caveats to the setups I’ll provide, plus general driving style for F2 class:
These setups are optimized for a pad user, not wheel users. Therefore you’ll have to tweak depending on input device and personal preference.
Baseline/Template F2 Car Setup
Let’s start with a basic, generic F2 setup you can save and bolt on the car to begin with in practice sessions, and then adjust to your liking for the track and personal preference:
- Wings – 25/27
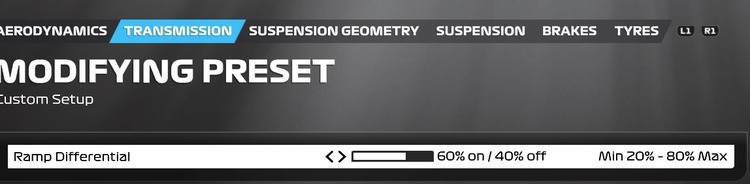
- Differential Ramp – 60/40
- Camber/Toe – 2.50/1.00/0.00/0.10 (RRLL)
- Suspension – 41-33-20-10-34-37
- Brake Bias – 56%
- Tyre Pressure – 22.4 Front/20.3 Rear
Note #1 – You will need to adjust the wings for different tracks, but this is a baseline to get started with. Here’s how I’d characterize the circuits, in terms of the approximate range of possible wing levels to use:
- Lowest downforce – Monza (8-12 wings)
- Low-Medium – Austria, Belgium (16-20 wings)
- Medium downforce – Baku, Bahrain, Imola, Britain, Australia, Jeddah (22-27 wings)
- High downforce – Spain, Abu Dhabi, Zandvoort (35-40 wings)
- Maximum downforce – Monaco, Hungary (45-50 wings)
As with the F1 cars, controller setups need very specific wing spacing, with the rear wing a few clicks ABOVE the front wing, for best stability and traction. Also I’d say that in general, the wings level used are slightly higher than the F1 cars on average, as without ERS in F2 cars, straight line speed becomes less important.
Note #2 – Also, don’t worry so much about brake bias if you’re using the ABS assist. You can set it to 50 or whatever you want.
A lot of F2 setups I’ve seen use insanely aggressive wing levels, with the rear wing 5-10 clicks below the front wing. I’ve no idea how a pad user could make this work, especially over longer races as the tyres start to wear. So I’ve modded for a more stable feel, with optimal rotation to help you get back on the power as smoothly as possible without spinning the car.
F2 Setups For Individual Tracks
For players wanting more specialized custom F2 car setups for specific circuits, I’ve listed some below for the 14 tracks that are on the official full F2 season that you can take part in on F1 23 career mode.
If you’re looking for even more F2 setups for circuits not on the official F2 calendar, check out this guy on YouTube, who has custom F2 setups for literally all tracks on the game (but pad users especially will need to adjust them to their own style).
But let’s get started with the main tracks you’ll need to race it in F2 career mode.
Bahrain
Here’s the custom setup I used for my first F2 race at Bahrain:
- Wings – 26/28
- Differential Ramp – 60/40
- Camber/Toe – 2.50/1.00/0.00/0.10 (RRLL)
- Suspension – 41-33-20-10-34-37
- Brake Bias – 56%
- Tyre Pressure – 22.4 Front/20.3 Rear
It’s just a modded verison of the generic setup, and I did OK considering it was my very first race. Traction is crucial on this circuit so space your wings apart for optimal levels of turn for you (not too little but not too much either).
Jeddah
The baseline setup with modded 30/32 wings also works OK at Jeddah, but I found this one was a bit better:
- Wings – 30/32
- Differential Ramp – 60/40
- Camber/Toe – 2.60/1.10/0.04/0.13
- Suspension – 41-30-20-10-33-37
- Brake Bias – 58%
- Tyre Pressure – 22.8 Front/20.4 Rear
Overtaking is hard at Saudi Arabia with the DRS trains, so qualifying position is crucial. As is making sure your setup is stable and consistent, so you don’t clip the walls (any kind of wing damage here kills your race). I’ve tried to space the wings out to help with this for pad users.
Imola
My baseline setup with the wings adjusted to 22/24 worked quite well for me round here. But here’s another setup you can test as well:
- Wings – 22/24
- Differential Ramp – 60/40
- Camber/Toe – 2.50/1.10/0.00/0.11
- Suspension – 41-16-10-4-34-37
- Brake Bias – 56%
- Tyre Pressure – 22.7 Front/20.3 Rear.
I wasn’t as fast or consistent with this setup and stuck to the template one, but everyone’s different so try it out. With Imola, be careful with the kerbs, especially in sector 1. Riding them too much will spit you off. Other than that, it’s about rhythm, consistency and getting good drive out of corners (space your wings apart for optimal rotation).
Australia
For Melbourne, the baseline setup just with the wings modded to anything between 24/26 and 28/30 worked best for me. I eventually settled on 28/30 wings for best single lap pace.
If this doesn’t work well for you, here another custom Australia setup:
- Wings – 28/30
- Differential Ramp – 80/20
- Camber/Toe – 2.50/1.00/0.00/0.11
- Suspension – 41-26-17-11-35-38
- Brake Bias – 56%
- Tyre Pressure – 22.9 Front/20.7 Rear
Again, overtaking is hard at Melbourne in F2 cars, because although you’re got plenty of DRS zones, you haven’t got many heavy braking zones into sharp corners to get overtakes done. Focus on getting good exits out of corners to get yourself the best chance.
Baku
The template setup with 24/26 wings worked great as a starting setup for me, but here’s another one as well that worked even better:
- Wings – 24/26
- Differential Ramp – 60/40
- Camber/Toe – 2.50/1.01/0.03/0.14
- Suspension – 28-21-12-8-33-35
- Brake Bias – 56%
- Tyre Pressure – 24.0 Front/21.6 Rear
The softer suspension and ride height plus higher tyre pressures seemed to help deliver an extra few tenths per lap for me at least. But both setups seemed to work well so compare and tweak to your preference. I normally hate driving Baku in F1 cars, but had quite a lot of fun in the F2 cars.
Monaco
For Monaco, my template setup with 47/50 wings worked as a good baseline, but then I found more time with this setup:
- Wings – 47/50
- Differential Ramp – 60/40
- Camber/Toe – 2.70/1.60/0.02/0.11
- Suspension – 24-12-2-7-34-38
- Brake Bias – 56%
- Tyre Pressures – Minimum all tyres
For this track, unless you’re a top level eSports players, it’s less about raw speed and more about finding a setup that you drive consistently without damaging your wing, and getting to the end. Overtaking is also next to impossible to qualifying position is crucial – go a bit more aggressive with the wing spacing if needed for a bit more lap time in Quali.
Spain
For Barcelona, just using the template setup with anything from 31 to 36 wings seemed to work very well (I eventually settled on 31/33 wings).
For pad users who want higher downforce, here’s a similar setup that also delivered good lap times:
- Wings – 36/38
- Differential Ramp – 60/40
- Camber/Toe – 2.50/1.10/0.02/0.12
- Suspension – 41-34-19-10-34-37
- Brake Bias – 56%
- Tyre Pressure – 22.4 Front/20.4 Rear
Overtaking has always been hard round here, and it’s even harder in F2 cars without the ERS, so prioritise qualifying over race pace.
Silverstone
For Great Britain the baseline setup with 28/30 wings worked well for me as a starter setup. Also, here’s a slightly different setup that delivered even better lap times once I got used to it:
- Wings – 28/30
- Differential Ramp – 60/40
- Camber/Toe – 2.50/1.70/0.01/0.10 (RRLL)
- Suspension – 41-35-16-13-34-38
- Brake Bias – 56%
- Tyre Pressure – 22.8 Front/20.9 Rear
Austria
For Austria, my baseline setup with 20/22 wings worked great around Austria on a controller, so that’s what I’m sticking with. You might want to experiment with wings anywhere from 16 to 24 depending on whether you prefer cornering speed or top speed.
Here’s another similar setup that can also work well:
- Wings – 20/22
- Differential Ramp – 60/40
- Camber/Toe – 2.50/1.00/0.00/0.10 (RRLL)
- Suspension – 41-33-14-6-33-37
- Brake Bias – 56%
- Tyre Pressure – 22.5 Front/20.4 Rear
Hungary
You can use the baseline setup with 46/48 or 48/50 wings as a decent starting point, but here’s another setup that’s optimised even better for grip round the prolonged corners:
- Wings – 46/48
- Differential Ramp – 60/40
- Camber/Toe – 2.60/1.20/0.03/0.13
- Suspension – 41-36-18-12-34-38
- Brake Bias – 56%
- Tyre Pressure – 22.3 Front/20.0 Rear
Zandvoort
This is a track where you can really use a wide range of wings from 35 to 50, but I settled on using the baseline setup with 40/42 wings as a starting point. Or here’s a setup that delivered basically identical lap times:
- Wings – 40/42
- Differential Ramp – 60/40
- Camber/Toe – 2.50/1.30/0.03/0.16
- Suspension – 41-38-21-14-34-37
- Brake Bias – 56%
- Tyre Pressure – 22.5 Front/20.8 Rear
Avoiding the raised kerbs is crucial at this track, as is qualifying/track position as overtaking is very difficult. You might want to prioritize single lap pace a bit more at Zandvoort to get the best starting position and manage from there.
Belgium
For Spa, I found the baseline setup with either 18/20 or 21/23 wings worked fine as a starting point. Here’s an alternate setup that also delivered similar lap times:
- Wings – 21/23
- Differential Ramp – 60/40
- Camber/Toe – 2.50/1.00/0.02/0.15
- Suspension – 41-30-14-10-33-36
- Brake Bias – 56%
- Tyre Pressure – 22.9 Front/20.8 Rear
You can go with a lower or higher downforce setup around here and still get comparable lap times, but be aware that using higher wings will make overtaking more difficult in the F2 cars.
Monza Setup
For Monza, you’re not using quite as low wing level as most players would for the the F1 cars, but you’re still quite low. I started off with my baseline setup using 12/14 wings.
Here’s another custom setup that I found a little extra time with:
- Wings – 12/14
- Differential Ramp – 60/40
- Camber/Toe – 2.50/1.00/0.00/0.13
- Suspension – 36-30-14-6-33-37
- Brake Bias – 56%
- Tyre Pressure – 23.8 Front/21.7 Rear
Abu Dhabi
For Yas Marina, using the baseline setup with 38/40 wings worked well for me as a starting point. And then here’s another more fine tuned setups that I found a couple more tenths using:
- Wings – 38/30
- Differential Ramp – 60/40
- Camber/Toe – 2.50/1.00/0.01/0.13
- Suspension – 38-35-19-14-35-37
- Brake Bias – 56%
- Tyre Pressure – 22.8 Front/21.2 Rear
Tips For Driving The F2 Cars
Here’s some additional caveats to the setups I’ll provide, plus general driving style for F2 class:
- As with F1 cars, it’s all about traction out of corners for pad users on this game. The torque and power delivery is a little harder to control on F2 cars, so you need to be cautious on throttle input (also lower the Diff Ramp setting to 60/40 or 40/60 for easier traction)
- If you’re using the ABS assist, brake bias doesn’t matter so much; just run 50 or whatever you want.
- Understeer is pretty bad on these F2 cars no matter the setup you use. It’s just a matter of getting used to it.
- Using partial throttle to hook the car around prolonged corners, until the car is pointing straight and you can go back on full throttle, is really important for lap time in these cars.
- Braking point is slightly earlier for F2 cars than F1 cars.
- The is DRS but no ERS on F2 cars.
- Overtaking is generally harder with these cars than F1, so good qualifying and race strategy is important.
