
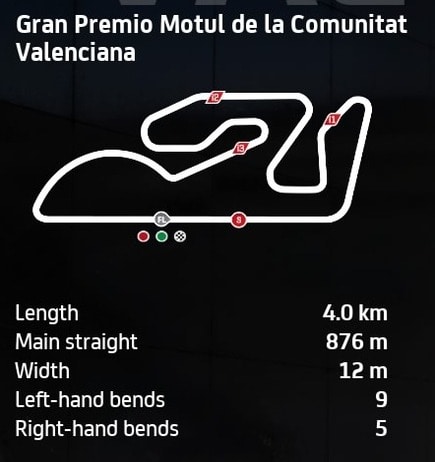
The Valencian GP at Circuit Ricardo Tormo has long been the season ending race of the MotoGP season. It’s a tight, technical, twisty track with some difficult corners to master and not much room to fully unleash the accelerator, but I really like riding this circuit.
For a bike setup, you need something that’s good at taking tight corners for sure. The rest of the challenge is learning the layout and not over-doing it on the power and over-running corners (very easy to do with lots of successive braking points all coming very soon after each other).
Update – I’ve just found a new basic starter GP class setup for all tracks that offers great balance under braking and leaning around this track – that’s a great place to get started and might already give you everything you need. However, I’ll also list a few custom setups for the circuit.
Here is a bike setup for the MotoGP class for Valencia:
- Suspension (Front Fork):
-
- Front pre-load – 4
- Oil Quantity – 4
- Front Spring Hardness – 4
- Front Swingarm compression – 7
- Front Swingarm extension – 4
-
- Rear Single Shock Absorber:
-
- Rear Pre-load – 7
- Swingarm connector – 4
- Rear spring hardness – 4
- Single shock absorber compression – 4
- Single shock absorber extension – 7
-
- Vehicle Geometry:
-
- Steering head inclination – 4
- Trail – 5
- Steering plate position – 7
- Rear swingarm length – 5
-
- Transmission:
-
- Gears (1-6) – 5-4-3-3-3-3
- Final ratio – 5
- Slipper clutch – 7
-
- Brakes:
-
- Front disc – 355 mm
- Rear disc – 220 mm
-
- ECU
-
- Traction control – 3
- Engine braking – 5
- Anti-wheelie – 3
- Power mapping – 2
-
This is really just a slight mod of my template MotoGP bike setup, as I found this was the one that was both easiest to control and delivered the best lap times when tested against a few other setups.
It’s geared for maximum braking force above all else to stop over-running the corners, plus strong traction as you’ve got some really prolonged corners that you’re easing the bike around and don’t want to lose the rear end.
But this is a really good setup for keeping the bike on track and getting into a rhythm of learning the successive corners. I liked using this setup round there and kind of got addicted to doing laps on Time Trial and had for force myself to come off!
Alternate MotoGP Bike Setup For Valencia
Of the few other setups I tested, there was was another one that was also pretty good, but not quite as good for me at least as the first one.
Here’s an alternate bike setup for the MotoGP class for Ricardo Tormo:
- Suspension (Front Fork):
-
- Front pre-load – 1
- Oil Quantity – 1
- Front Spring Hardness – 1
- Front Swingarm compression – 7
- Front Swingarm extension – 4
-
- Rear Single Shock Absorber:
-
- Rear Pre-load – 7
- Swingarm connector – 7
- Rear spring hardness – 6
- Single shock absorber compression – 7
- Single shock absorber extension – 5
-
- Vehicle Geometry:
-
- Steering head inclination – 5
- Trail – 6
- Steering plate position – 7
- Rear swingarm length – 4
-
- Transmission:
-
- Gears (1-6) – 3-4-5-3-5-4
- Final ratio – 5
- Slipper clutch – 7
-
- Brakes:
-
- Front disc – 355 mm
- Rear disc – 220 mm
-
- ECU
-
- Traction control – 3
- Engine braking – 5
- Anti-wheelie – 3
- Power mapping – 2
-
This was also a pretty easy setup to get consistent with round Ricardo Tormo and get into a rhythm, but I extracted a bit more lap time out of the first setup. Test it out though and see what you think, as setups and bike handling is very subjective and different setups will get different players to the same end result in terms of lap time.
Moto2 and Moto3 Bike Setups For Valencia
The less powerful Moto2 and Moto3 bikes are easier to handle round here. But you’ve got to be careful on the braking especially to get stopped properly for getting around the hairpins.
If you’re looking for custom setups for these class bikes, try out our generic starter setups for both Moto2 and Moto3 bikes, which gives you a starter setup to test against your default to find some more time or consistency.
Tips For Riding Around Valencia
I don’t normally like really tight, twisty circuits like this, but Ricardo Tormo has quickly become one of my favourite tracks. There’s something about the rhythm and flow of it that’s fun and satisfying to get right.
Here’s some extra tips for riding around there.
Cautious on Accelerator – This isn’t a “let it rip” track where you can nail the power for long periods. The only real straight you’ve got is the pit straight, and even that isn’t particularly long. Therefore once the straight is out the way, on the MotoGP bikes especially it’s restrained “dab and squirt” mode on the power for the rest of the lap – just short bursts or taps before you’re coasting and braking again. There is the second straight after turn 1, but it’s very short on the MotoGP bikes. And there’s a short back straight but it’s got a left-kink halfway along it. So you’re not on full power very much round here. It’s more about precise braking and leaning.
Corner entry/exits – Ricardo Tormo is such a technical track that I’ll break down what you need to do on certain corner exits for MotoGP bikes:
- Turn 1/2 – Brake for this just before you reach the red overhead board, and you can carry a bit more speed into this corner as it widens on the exit. Then, it’s just a short squirt on the power for 1.5-2 seconds before you need to lift off and start braking for the very sharp turn 2 hairpin. Use the rear brake as well as the front to get the bike leaned in.
- Turn 2 exit – Just need the very slightest dab on the power before you need to lean in again for the left hand kink that is turn 3.
- Turn 3 exit – Literally as soon as you take turn 3, come off the throttle and start coasting/braking for turn 4 right hander.
- Turn 4 exit – Very slight dab on the power again before you coast/brake for turn 5.
- Turn 5 exit – Very slight dab again before you brake for the left hand turn 6 onto the short back straight.
- Turn 7/8 – If you get your turn in right, you can take this flat on a MotoGP bike. But literally as soon as you pass T7, come off the power and start braking (front & rear brake) for the sharp turn 8 hairpin.
- Turn 8 exit – Just a very slight dab on the power before you lean in to clip the left right chicane of T9/T10.
- Turn 11 – As you’re going through the chicane, you can add a very slight dab of power to push the bike through the longer T11, as it’s actually two right hairpins kind of rolled into one. Not too much though or the bike will run off.
- Exit Turn 11 – Just a short squirt of maybe 1 second or so out of T11 before you need to coast/brake for turn 12. I use the front and rear brake for this, and clip the inside kerb a little bit to get on the power quicker for the long loop of Turn 13.
- Exit Turn 12 – Turn 14 – This is like a long looping bowl shaped section that you can take mostly flat if you get your line right. Keep to the middle of the track and keep the bike partially leaned over but not too much. Come off the power and brake for turn 14 once you see the track falling away on your left.
