
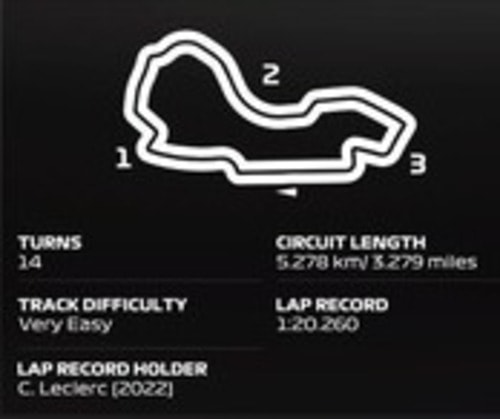
The Albert Park circuit in Melbourne has been a long standing part of the F1 calendar for 25+ years now, and was recently modified from 2022 onwards the make it even more high speed than it already was.
It’s a flowing, fast circuit with large amounts of full throttle now because a chicane has been removed in sector 2, but it’s still quite a technical circuit in some areas and you need to dial in a good setup to be competitive there.
Despite the high speed nature and basically entirely full throttle sector 2, you actually need a medium level of downforce at Australia.
Here’s a general baseline dry race setup for Australia for a controller user:
- Wings – 26/28
- Diff – 50/55
- Camber – -2.50/-1.00/0.03/0.12
- Suspension – 23-3-6-1-34-37
- Brakes – 100% Pressure/55 Bias
- Tyres – Fronts 22.6/Rears 20.1
(RR just mean both camber settings all the way to the right).
This setup is partially taken from the this YouTube channel Melbourne race setup (huge credit for the great helpful content he provides), modded for a controller.
But he uses a wheel and I don’t like the wing spacing he uses. Using a pad on F1 23, I need a the rear wing 2 clicks higher than the front wing for better stability and the right amount of turn in to get back on the throttle smoothly.
Extra Setup Considerations
Here’s some additional analysis of race setups around Melbourne.
Wings
You can actually play around quite a bit with the wing levels and Melbourne, and there’s quite a lot of variance in race setups. Some players use lower wings in the early 20s, others, go out past 30 wings in their setup.
Play around with any wings from about 24 to 30, and see what works for you, but be aware that straight line speed is important in the dry since there are 4 DRS zones.
With straight line speed being over-powered anyway on this game, find whatever wing level gives you an optimal single lap time, and consider dropping it a few clicks for your race setup, since this offers big advantages in the race (see video below).
Low downforce overpowered On F1 23 – tested
Intermediate Conditions
Your dry setup will work OK in intermediate, but you can also try adding 2-3 clicks of front and rear wing to get your round the sweeping corner sections better. I’d recommend keeping the rear 2 clicks above the front wing though when using a pad, and possibly even 3 clicks if it gives you better stability and traction
Full Wet Conditions
Wet weather sessions are not uncommon in Melbourne, and in full wet blue tyre conditions, you will need a low more wing to drag yourself round the sweeping and low speed corners better. Straight line speed becomes less important when DRS is disabled here.
Add anything between 4-6 clicks of front and rear wing to your normal dry setup. I’d put the rear wing 3 clicks above the front wing for more stability and traction.
Here would be the full wet setup I’d use on a controller at Australia:
- Wings – 30/33
- Diff – 50/55
- Camber – -2.50/-1.00/0.00/0.10
- Suspension – 28-8-8-1-40-43
- Brakes – 95 Pressure/55 Bias
- Tyres – Minimum pressures front & rear
You’re basically just few clicks more wing for more downforce especially for Sector 1 and Sector 3, which will be more tricky in the wet. See our guide on converting dry setups to wet setups for more detailed information on this.
Alternative Setup Resources
This is a baseline pad setup to get started with at Australia, but everyone drives differently plus cars vary in their handling. If you’re wanting more precise, fine tuned setups for different cars, conditions and game modes, here are some more resources to check out:
- F1laps.com Australia page – Another car setup forum with pages for every track, and loads of custom setups posted, both TT and race, all cars, all conditions.
- F1gamesetup.com – An even more specialized resource with custom setups, every car and every track, wet and dry weather.
Extra Racing Tips
The Melbourne track is pretty straightforward once you get used to it, but here are a few extra tips for racing there:
Kerbs – Be careful with the kerbs at the high speed left-right chicane at the end of sector 2, leading onto the last DRS zone. Both the actual chicane kerbs and the exit kerb on the left as you go onto the DRS straight. If you ride them too much, they’ll spit you off.
Last corner – That right hander coming back onto the pit straight is deceptively tricky and always where I lose the car. Over-rotation and going full throttle too soon as your main enemies here – be patient and progressive on throttle and steering.
Lower Downforce – A lower downforce setup will really come back to you in the race, even if it costs you a bit in qualifying. See the second embedded video above for a good demo of this. Australia is one of those tracks where lower wings helps a lot in sector 2, so err on the lower side of wings levels for best race performance in the dry.
