
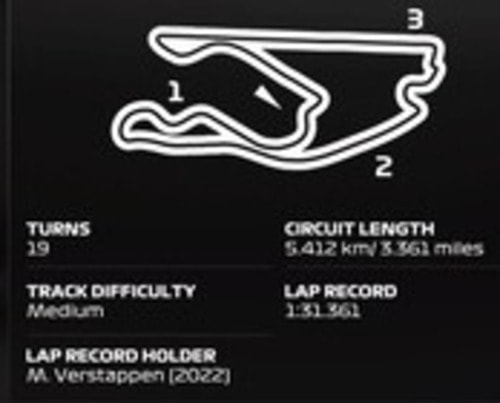
The new Miami circuit was introduced in 2022, and although it’s not one of my favourites personally, some people love it and it’s got it’s own unique corners and sections. It’s an idiosyncratic circuit for sure, with a couple of long straights, plus some undulating, technical twisty sections as well.
This means you need a bit of everything on this track (cornering and straight line speed), but ultimately for race setup purposes, straight line speed takes priority as it does on most tracks on F1 23. It requires a low-medium downforce setup, similar to Austria and France.
Here’s a general baseline dry race setup for Miami for a controller user:
- Wings – 16/17
- Diff – 50/55
- Camber – -2.50/-1.00/0.03/0.20
- Suspension – 22-8-10-1-35-38
- Brakes – 100% Pressure/55 Bias
- Tyre pressures – Fronts 22.9/Rears 20.4
This is an adapted setup from the SimRacingSetups channel Miami setup, but adjusted quite a lot for a controller as he uses a wheel and I find the wing spacings don’t translate well to a pad user and need tweaking substantially. Controller input is substantially different from a wheel input.
Setup Considerations For Miami
Miami is one of my weakest tracks and this is one of my weakest setups in all honesty. Here are some additional explanations and commentary on the Miami race car setup:
Wings
There’s two very long straights at Miami, both DRS zones as well, so straight line speed is king here. That’s why the wings are quite a bit lower than you might think looking at the twisty nature of some of the layout.
You just need lower wings to stop being blasted past on the straights by following cars using the very powerful DRS/ERS/Slipstream combo. Yes, using lower wings does make the car a bit more sluggish in the more twisty sector 1, but you can make it back on the straights, as long as you keep DRS on the cars in front.
Some setups use even lower wings than 16/17, and you can also sometimes find better single lap pace by using higher wings (20/21 for example), but you’ll likely find yourself a sitting duck on the straights using wings that high.
Lower downforce setups over-powered on F1 23 – definitely true at Miami
Traction/Stability vs Rotation
This is a paradox I’ve still not managed to resolve yet with my Miami setup, and why it’s not my strongest setup. I’ve put the wings closer together than normal for stronger rotation and turn in for the tricky sector 1, but traction is still harder than I want it to be in some parts of the lap because the car is over-rotating.
But spread the wings apart any further and my pace is awful in sector 1. Not quite managed to find an ideal setup compromise for this; still working on setup tweaks to improve turn in but also stability in sector 1 especially.
Intermediate Conditions
Straight line speed becomes a little less crucial in intermediate wet weather with DRS disabled, but it’s still advised to keep relatively low wings.
Your dry setup with still work OK in intermediate conditions, but try adding 1-2 clicks of front and rear wing for more grip and traction in sector 1 especially and the chicane section at the end of sector 2. You can even try up to 20/21 wings, but you might again leave yourself vulnerable on the straights to cars using lots of ERS to attack.
Full Wet Conditions
Heavy rain conditions make the sector 1 at Miami especially tricky with the initial traction zones, and the high speed change of direction, and it’s easy to lose the rear end here in the wet.
But you still need some decent speed on the main straights because they’re so long, so you need to find a compromise. Try adding 4-6 clicks on wing to your dry setup, plus moving the on Throttle Diff down to 50 if it’s not already there is a must for best traction. Raise your ride height a few clicks, and soften your suspension a few clicks as well.
For pad users, I’d also recommend spacing the wings even more apart, putting the rear wing 2-3 clicks above the front wing for more stability and traction (over-rotation is your enemy on twisty tracks like this when using a controller in wet conditions).
Here would be the full wet setup I’d use on a controller at Miami:
- Wings – 20/23
- Diff – 50/55
- Camber – -2.50/-1.00/0.00/0.10
- Suspension – 20-7-7-1-38-41
- Brakes – 95/55
- Tyres – Minimum pressures front & rear
You’re basically just adding a bit more wing, but not so much that you become uncompetitive on the straights. See our guide on converting dry setups to wet setups for more detailed information on this.
Other Setup Resources For Miami
The Miami circuit is still relatively new on the calendar, featuring for only the second time on F1 23, and setups are still evolving. The biggest factor here is how low a wing setting can you get away with to still maintain good overall pace, and be able to overtake/defend on the massive DRS straights.
If you’re looking for more finely tuned setups for different cars, game modes and conditions, check out these additional setup resources:
- F1laps.com Miami page – Another car setup forum with pages for every track, and loads of custom setups posted, both TT and race, all cars, all conditions.
- F1gamesetup.com – An even more specialized resource with custom setups, every car and every track, wet and dry weather.
Tips For Racing Round Here
The Miami circuit is a really unique one and it’s tricky to really get right at first. And I’ll preface this by saying it’s not one of my strongest circuits either. Here are some additional suggestions for racing/strategy there:
Overpowered AI
Unfortunately, the AI are over-powered both at the end of sector 1, and onto the first massive DRS straight in sector 2. Their speed on this straight is incredible, and they always seem to get a good exit onto it as well off the sector 1 “esses”.
Keep your wing angles low, and work on getting as good an exit as possible onto this first DRS zone, and use your ERS when needed to defend. Their straight line speed in general around this whole track is hard to compete against.
Sector 1
Because of how tricky it can be to defend on the long sector 2 straight, it makes it even more important to keep up good momentum in sector 1 and come onto sector 2 with good speed and a defendable gap to the cars behind. But the very fact we have to use lower wings reduces downforce and makes this tricky.
Practice nailing sector 1 with precise braking, good exits (short shifting the gears helps with wheelspin and traction) and then the least amount of braking possible in the higher speed “esses” to scrub off as little speed as possible. I find turn 1 especially tricky, but find a “slow in, fast out” approach is better.
You can also mount the kerbs a little bit in these “esses” for the shortest racing line, but not too much or they’ll spit you off. You can even try reducing brake pressure a little bit if it allows you to keep up more minimum speed here.
Second DRS zone
The second DRS zone in sector 3 is also massive and leaves you vulnerable if you’re using too high wing levels. Work on mastering that technical, undulating left-left-right-left chicane section that leads on it.
You can drive over the kerbs a little in this section for the shortest line, and also work on getting good traction onto the long straight.
With a good exit and a little blast of ERS, together with competitive wing levels, you can usually stave off the AI on this straight (but only just). But a good exit is crucial – work on perfecting that chicane section, and don’t be too greedy on the throttle on exit.
Last corner
That sharp left hander before you go back onto the start-finish line is really tricky. If you’re on Medium or no TC, you need to be patient and progressive on the throttle out of this corner, not going in full throttle until you get to the kerb on your left hand side, then go flat. It’s easy to over-rotate the car and lose traction here.
ERS
The battery boost ERS runs out very quickly around here. It’s not quite on the level of Singapore or Qatar for ERS use, but it isn’t far off. Use it very sparingly as in a stock car, it’s very difficult to recover ERS once you’ve spent it (in upgraded career cars it’s a bit easier).
Fuel
For me at least, this circuit uses more fuel than normal. Perhaps because you’re on full throttle for so much of the lap. Whatever fuel load you’d normally use, put a few more clicks in at least to be safe in the race.
